Introduction
In this quick tutorial we are going to see a very basic example of how to dockerize a Spring Boot application using Docker. Docker is a containerization tool used to package the application with all its dependencies and libraries, and ship it as a single package. Containers are created with the help of Images which are a read-only templates with instructions to create docker containers.
Most of the famous applications like MySQL, MongoDB have created their images and uploaded them to Docker hub which is a docker repository. We can pull the images and create container out of it.
We can also create our own images by creating a Dockerfile. Inside the Dockerfile we will write all the instructions required to create a container with required artifacts. This is what we are going to see in the blog post. If you want to know more about Docker then click here.
Hello World Spring Boot Application
Project Requirements
- JDK 11 or above, we are using JDK 17.
- Docker Engine for creating Spring boot containers (Docker Desktop).
- Any Command prompt to run docker commands.
- Intellij IDE.
When you create your spring boot application from either IDE or start.spring.io, all you need to write is a controller and a method in it. This method will return “Hello Docker” in response. We have not created a complex application because our goal is to just create an image and create/run the container out of it.
import org.springframework.web.bind.annotation.GetMapping;
import org.springframework.web.bind.annotation.RestController;

@RestController
public class HelloController {

    @GetMapping("hello")
    public String helloDocker(){
        return "Hello Docker";
    }
}
If you want see the project structure, scroll below as its mentioned in the “Docker File Step by Step” section.
Lets check if our spring boot application is running and what is the output if we hit the helloDocker controller method. You can either use postman application to hit the endpoint or run curl command in the windows command prompt.
curl -v localhost:8080/hello
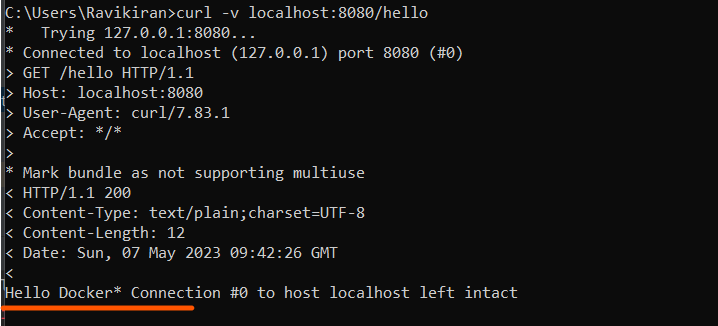
Now that we have seen our application is up and running, we will create the Dockerfile and carry on with the further steps.
Creating Docker File Step by Step
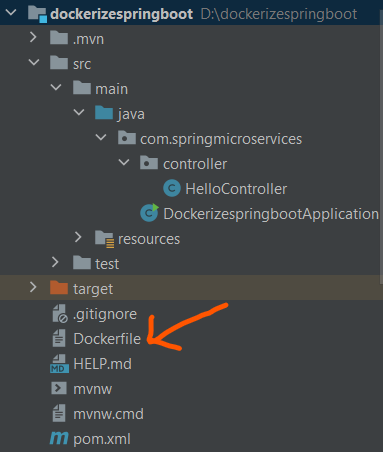
In order to Dockerize our “Hello Docker” Spring Boot application we need to add a Dockerfile to the root of our project. This file does not have any extension attached to it like .txt or .doc. See the below image where Dockerfile is added to the root. Below is how the project structure looks like.
Contents of the Dockerfile should look below. Lets see the explanation of Dockerfile line by line.
FROM openjdk:17
EXPOSE 8080
ADD target/dockerizespringboot.jar dockerizespringboot.jar
ENTRYPOINT ["java","-jar","dockerizespringboot.jar"]
- FROM refers to the base image which we need to refer in order to create a container. This base image can either exist locally or in the remote container repository. Here we are using openjdk:17.
- EXPOSE in the Dockerfile refers to the port we expose so that others can talk to our application container. EXPOSE lets Docker know that our container is listening to the specified port at runtime.
- ADD in the Dockerfile is used to copy the new files, directories, remote file URLs from the source and add them to the image filesystem at the specified path. In our file we are copying the dockerizespringboot.jar file present in the target folder to the destination with name dockerizespringboot.jar.
- ENTRYPOINT specifies the command that Docker will use to run the application. Here, our application will run after executing the java -jar dockerizespringboot.jar command.
Generating the .jar file
We need a .jar file of our application so that it will be used by the Docker to get our application up and running. As seen in the Docker file, the .jar file present in the target directory will be copied to the image filesystem.
Building the Spring Boot Docker image
Before building the application, make sure that Docker engine is up and running. We need to execute the docker build command in the windows command prompt or IntelliJ’s default terminal.
docker build -t dockerizespringboot:hello-docker .
The “build” command will build the image according to the instructions provided in the Dockerfile. The -t flag is used to give a tag name to our image. After executing the build command you will see the below logs.

Once the docker build command gets executed, you will see the your image generated after running the below command.
docker images

Docker container creation
Use the below docker command to create the docker container from the image that we created above.
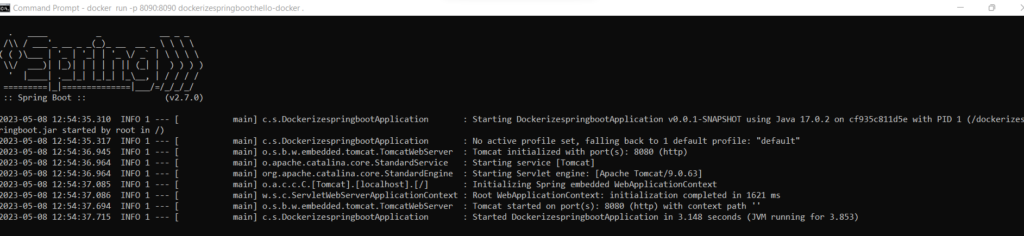
docker run -p 8080:8080 dockerizespringboot:hello-docker .
Once you run the command you will see your application logs stating that the application is up and running.
Also you can see the list of running containers running by executing the below docker command.
docker ps

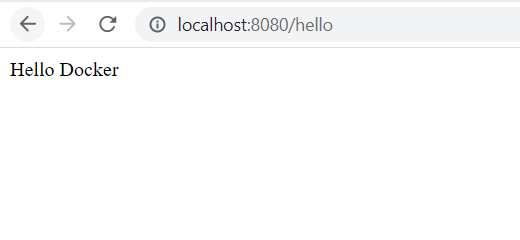
Since our application is up and running, lets hit the endpoint using postman or chrome browser.
Conclusion
In this article, we learned how to dockerize your Spring Boot application. I hope now you are an expert😉. Feel free to comment and provide your feedback if you think we provided some value. Your feedback will help us improve on the style of writing. Happy Learning!! 😊
