Table of Contents
Introduction
Are you looking for an easy step by step guide which shows how to perform CRUD operations in Redis Cache? Then you are on the right website. By the end of this post you will learn how to perform CRUD (Create, Read, Update, Delete) operations in Redis Cache without any doubts.
What is Redis
Redis stands for Remote Dictionary Server which is an in-memory database. Redis is primarily known for its caching solutions on top of other databases (like Postgres, oracle etc) to improve the application performance. Redis is schema less. But interesting fact to note is, Redis itself can be used as a full-fledged primary database that can be used to store and persist multiple data formats for complex application. Redis Stack is a multi-module solution which contains a lot of modules. We can choose the required module based on our requirement.
Why do we require caching
Caching is required to avoid unnecessary network calls to the database. For Example, if there is a new cellphone launched by Samsung on ecommerce portal. There will be a lot of calls to retrieve the information about the new Samsung phone. Instead of retrieving the information by hitting the database all the time, we can cache the information to improve the application performance and latency by avoiding unnecessary network calls.
Components of Redis Stack
- Redis-core : key-value store
- RediSearch : Search functionality same like elastic search. Provides full-text search and a query language for Redis. This feature enables multi-field queries, aggregation, exact phrase matching, and numeric filtering for text queries.
- RedisGraph : For graph data storage.
- RedisTimeSeries : RedisTimeSeries is a time series database. It will have high volume inserts and low latency reads. The query will mostly be done by start time and end time.
- RedisJSON : It provides JSON support in Redis. RedisJson lets you store, update and retrieve JSON values. Works along with RediSearch to let you index and query your JSON documents.
- RedisBloom : It contains bloom filters and other probabilistic data structures for Redis.
- RedisInsight : A powerful tool for visualizing and optimizing data in Redis
Installing Redis Stack on Windows
We will install Redis Stack using docker. If you don’t have docker running on your system then make sure you install docker. If you have docker running on your system, then you can execute below command which will install the latest version of Redis stack. The installation will contain both Redis server as well as Redis insights
docker run -d --name redis-stack -p 6379:6379 -p 8001:8001 redis/redis-stack:latest
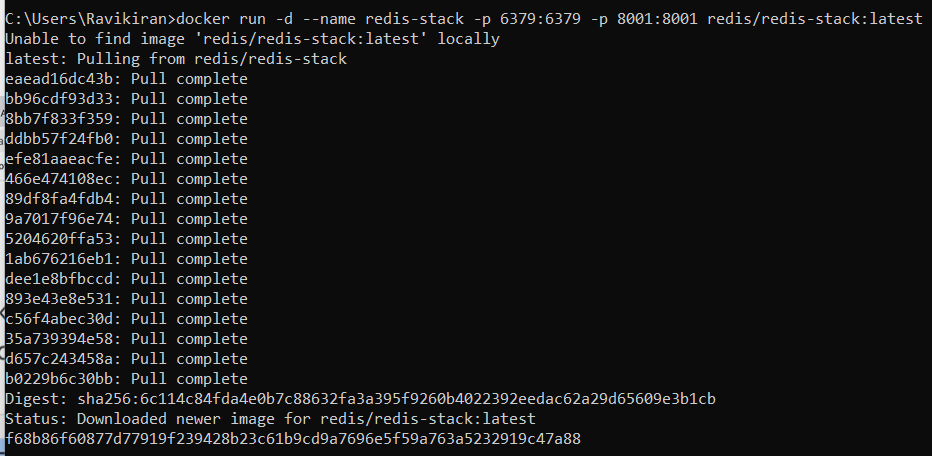
To see if the image is successfully downloaded we can run below command “docker images”

Below image shows that Redis stack is up and running

In order to see the Redis Insight, type localhost:8001 in the browser, accept the terms and conditions and you will see the below view. It is connected to the Redis server as well.

Implementing Redis Cache in Spring Boot
We need to add below dependencies in our pom.xml.
	<dependencies>
		<dependency>
			<groupId>org.springframework.boot</groupId>
			<artifactId>spring-boot-starter-data-redis</artifactId>
		</dependency>
		<dependency>
			<groupId>mysql</groupId>
			<artifactId>mysql-connector-java</artifactId>
			<scope>runtime</scope>
		</dependency>
		<dependency>
			<groupId>org.springframework.boot</groupId>
			<artifactId>spring-boot-starter-data-jpa</artifactId>
		</dependency>
		<dependency>
			<groupId>org.springframework.boot</groupId>
			<artifactId>spring-boot-starter-web</artifactId>
		</dependency>
		<dependency>
			<groupId>org.projectlombok</groupId>
			<artifactId>lombok</artifactId>
			<optional>true</optional>
		</dependency>
	</dependencies>
Update application.properties
spring.datasource.url=jdbc:mysql://localhost:3306/dev
spring.datasource.username=root
spring.datasource.password=root
spring.datasource.driverClassName=com.mysql.cj.jdbc.Driver
spring.jpa.properties.hibernate.dialect = org.hibernate.dialect.MySQL5Dialect

spring.jpa.show-sql = true
spring.jpa.hibernate.ddl-auto = update

spring.cache.type=redis
spring.cache.redis.cache-null-values=true
#spring.cache.redis.time-to-live=9000
Adding @EnableCaching annotation in the main class.
package com.springmicroservices;

import org.springframework.boot.SpringApplication;
import org.springframework.boot.autoconfigure.SpringBootApplication;
import org.springframework.cache.annotation.EnableCaching;

@SpringBootApplication
@EnableCaching
public class PetprojectRedisDemoApplication {
	public static void main(String[] args) {
		SpringApplication.run(PetprojectRedisDemoApplication.class, args);
	}
}
Creating an Entity class named UnicornEntity.java
package com.springmicroservices.entity;

import jakarta.persistence.*;
import lombok.Data;
import org.hibernate.annotations.GenerationTime;
import org.hibernate.annotations.GenericGenerator;
import java.io.Serializable;

@Entity
@Table(name="unicorn")
@Data
public class UnicornEntity implements Serializable {

    private static final long serialVersionUID = 7156526077883281623L;

    @Id
    @GeneratedValue(strategy = GenerationType.AUTO)
    long id;
    @Column(name="first_name")
    String firstName;
    @Column(name="last_name")
    String lastName;
    @Column(name="company")
    String company;
    @Column(name="wealth")
    String wealth;
}
Creating a controller class as UnicornController.java
package com.springmicroservices.controller;
import com.springmicroservices.entity.UnicornEntity;
import com.springmicroservices.model.Unicorn;
import com.springmicroservices.service.UnicornService;
import org.springframework.beans.factory.annotation.Autowired;
import org.springframework.web.bind.annotation.*;

@RestController
public class UnicornController {

    @Autowired
    UnicornService unicornService;

    @GetMapping("hello")
    public String hello() {
        return "Hello";
    }

    @PostMapping("unicorn")
    public UnicornEntity addUnicorn(@RequestBody Unicorn unicorn) {
        return unicornService.addUnicorn(unicorn);
    }

    @GetMapping("unicorn/{id}")
    public UnicornEntity getUnicorn(@PathVariable("id") long id) {
        return unicornService.getUnicorn(id);
    }

    @DeleteMapping("unicorn/{id}")
    public String deleteUnicorn(@PathVariable("id") long id) {
        return unicornService.deleteUnicorn(id);
    }
}
Creating a service class as UnicornService.java
In the service class we have made use of @Cachable, @CacheEvict, @CachePut annotations.
When we make use of @Cachable annotation in the GET operation, if the request data is not present in the cache, it will make a database call, return the data and store the returned data in the cache.
@CacheEvict annotation is used along with DELETE operation. When the requested data is deleted from the database, @CacheEvict annotation makes sure to delete the data from the cache.
@CachePut annotation is used along with PUT operation. When there is a database record update call, the data is updated in the database as well as cache.
package com.springmicroservices.service;

import com.springmicroservices.entity.UnicornEntity;
import com.springmicroservices.model.Unicorn;
import com.springmicroservices.repository.UnicornRepository;
import org.springframework.beans.factory.annotation.Autowired;
import org.springframework.cache.annotation.CacheEvict;
import org.springframework.cache.annotation.CachePut;
import org.springframework.cache.annotation.Cacheable;
import org.springframework.stereotype.Service;
import java.util.Optional;

@Service
public class UnicornService {

    @Autowired
    UnicornRepository unicornRepository;

    public UnicornEntity addUnicorn(Unicorn unicorn) {
        UnicornEntity unicornEntity = new UnicornEntity();
        unicornEntity.setId(System.currentTimeMillis());
        unicornEntity.setCompany(unicorn.getCompany());
        unicornEntity.setFirstName(unicorn.getFirstName());
        unicornEntity.setLastName(unicorn.getLastName());
        unicornEntity.setWealth(unicorn.getWealth());
        return unicornRepository.save(unicornEntity);

    }

    @Cacheable(value="UnicornEntity", key="#id")
    public UnicornEntity getUnicorn(long id) {
        Optional<UnicornEntity> unicorn = unicornRepository.findById(id);
        if(unicorn.isPresent()) {
            return unicorn.get();
        }
        return null;
    }

    @CacheEvict(value="UnicornEntity", key="#id")
    public String deleteUnicorn(long id) {
        unicornRepository.deleteById(id);
        return "success";
    }
}
Creating a repository class as UnicornRepository.java
package com.springmicroservices.repository;

import com.springmicroservices.entity.UnicornEntity;
import org.springframework.data.jpa.repository.JpaRepository;
import org.springframework.stereotype.Repository;

@Repository
public interface UnicornRepository extends JpaRepository<UnicornEntity, Long> {
}
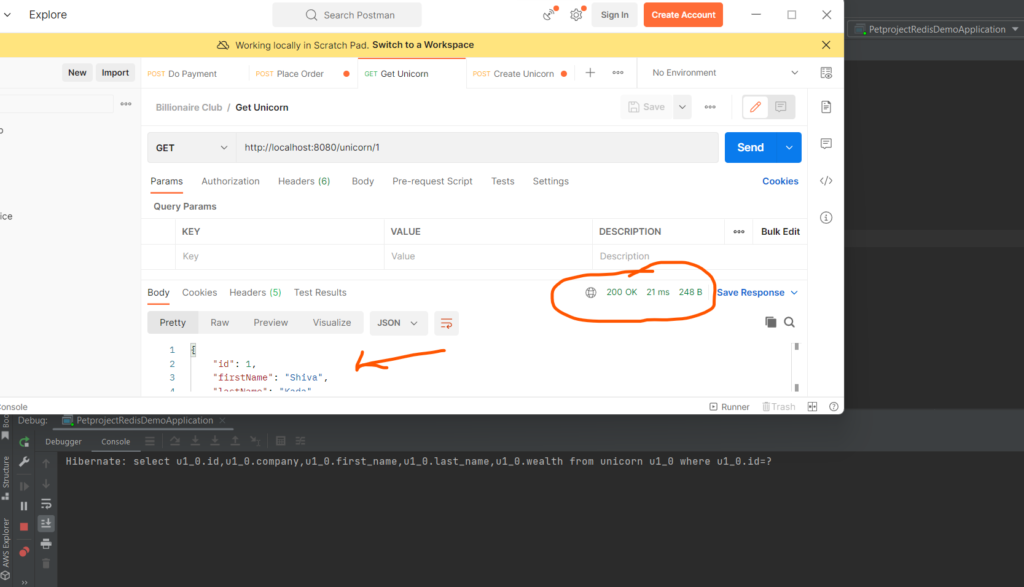
Performance Results Before Caching
When we do a GET operation for id=1, then we can see that the time taken was 21 milliseconds and it also hit the database by invoking the select query.
When we check the Redis Insights, we will see that the record also got stored in the Cache

Performance Results After Caching
When we invoke a GET call for id=1 for the second time, the time taken was 14 milliseconds and database call was not made. The select query that you see in the console is of the first GET call made.

Similarly you can try for PUT and DELETE operations
Wrapping up
With that being said, we have come to an end of this basic CRUD operations Redis cache blog post. I hope you enjoyed the post and got to learn something out of it. Let me know your views. If you have any suggestions or doubts feel free to comment and I will be happy to answer. Keep learning 🙂

Leave a Reply